I’m a passionately motivated person. When I find something I am interested in I throw myself into learning as much about the subject as possible. I know this to be true because it’s what my father has remarked about me, so it must be true.
At the same time I am often attempting to discover the root of what makes something good. In this case, what makes a good photograph? Given some parity regarding photographic equipment, what makes one professional photographer better than another? If it is not the quality of the equipment (given relative parity) what are the distinguishing aspects or characteristics that go into making a good photograph? Perhaps it is vision, and perhaps it is also the photographer’s skill at using the camera to depict something interesting.
This inquiry has led me to learn as much as I can about how the camera affects the image we are attempting to capture, and I’ve been learning, although slowly for my taste. Some of what I have learned is pretty basic and some is more complicated, but each thing I have learned has led to an “aha!” moment. I thought I might share some of them in posts on this blog, perhaps to create an “aha!” moment in you but more likely to make sure the lesson has really stuck in me (I’m following the old adage that if you really want to understand something, teach it.)
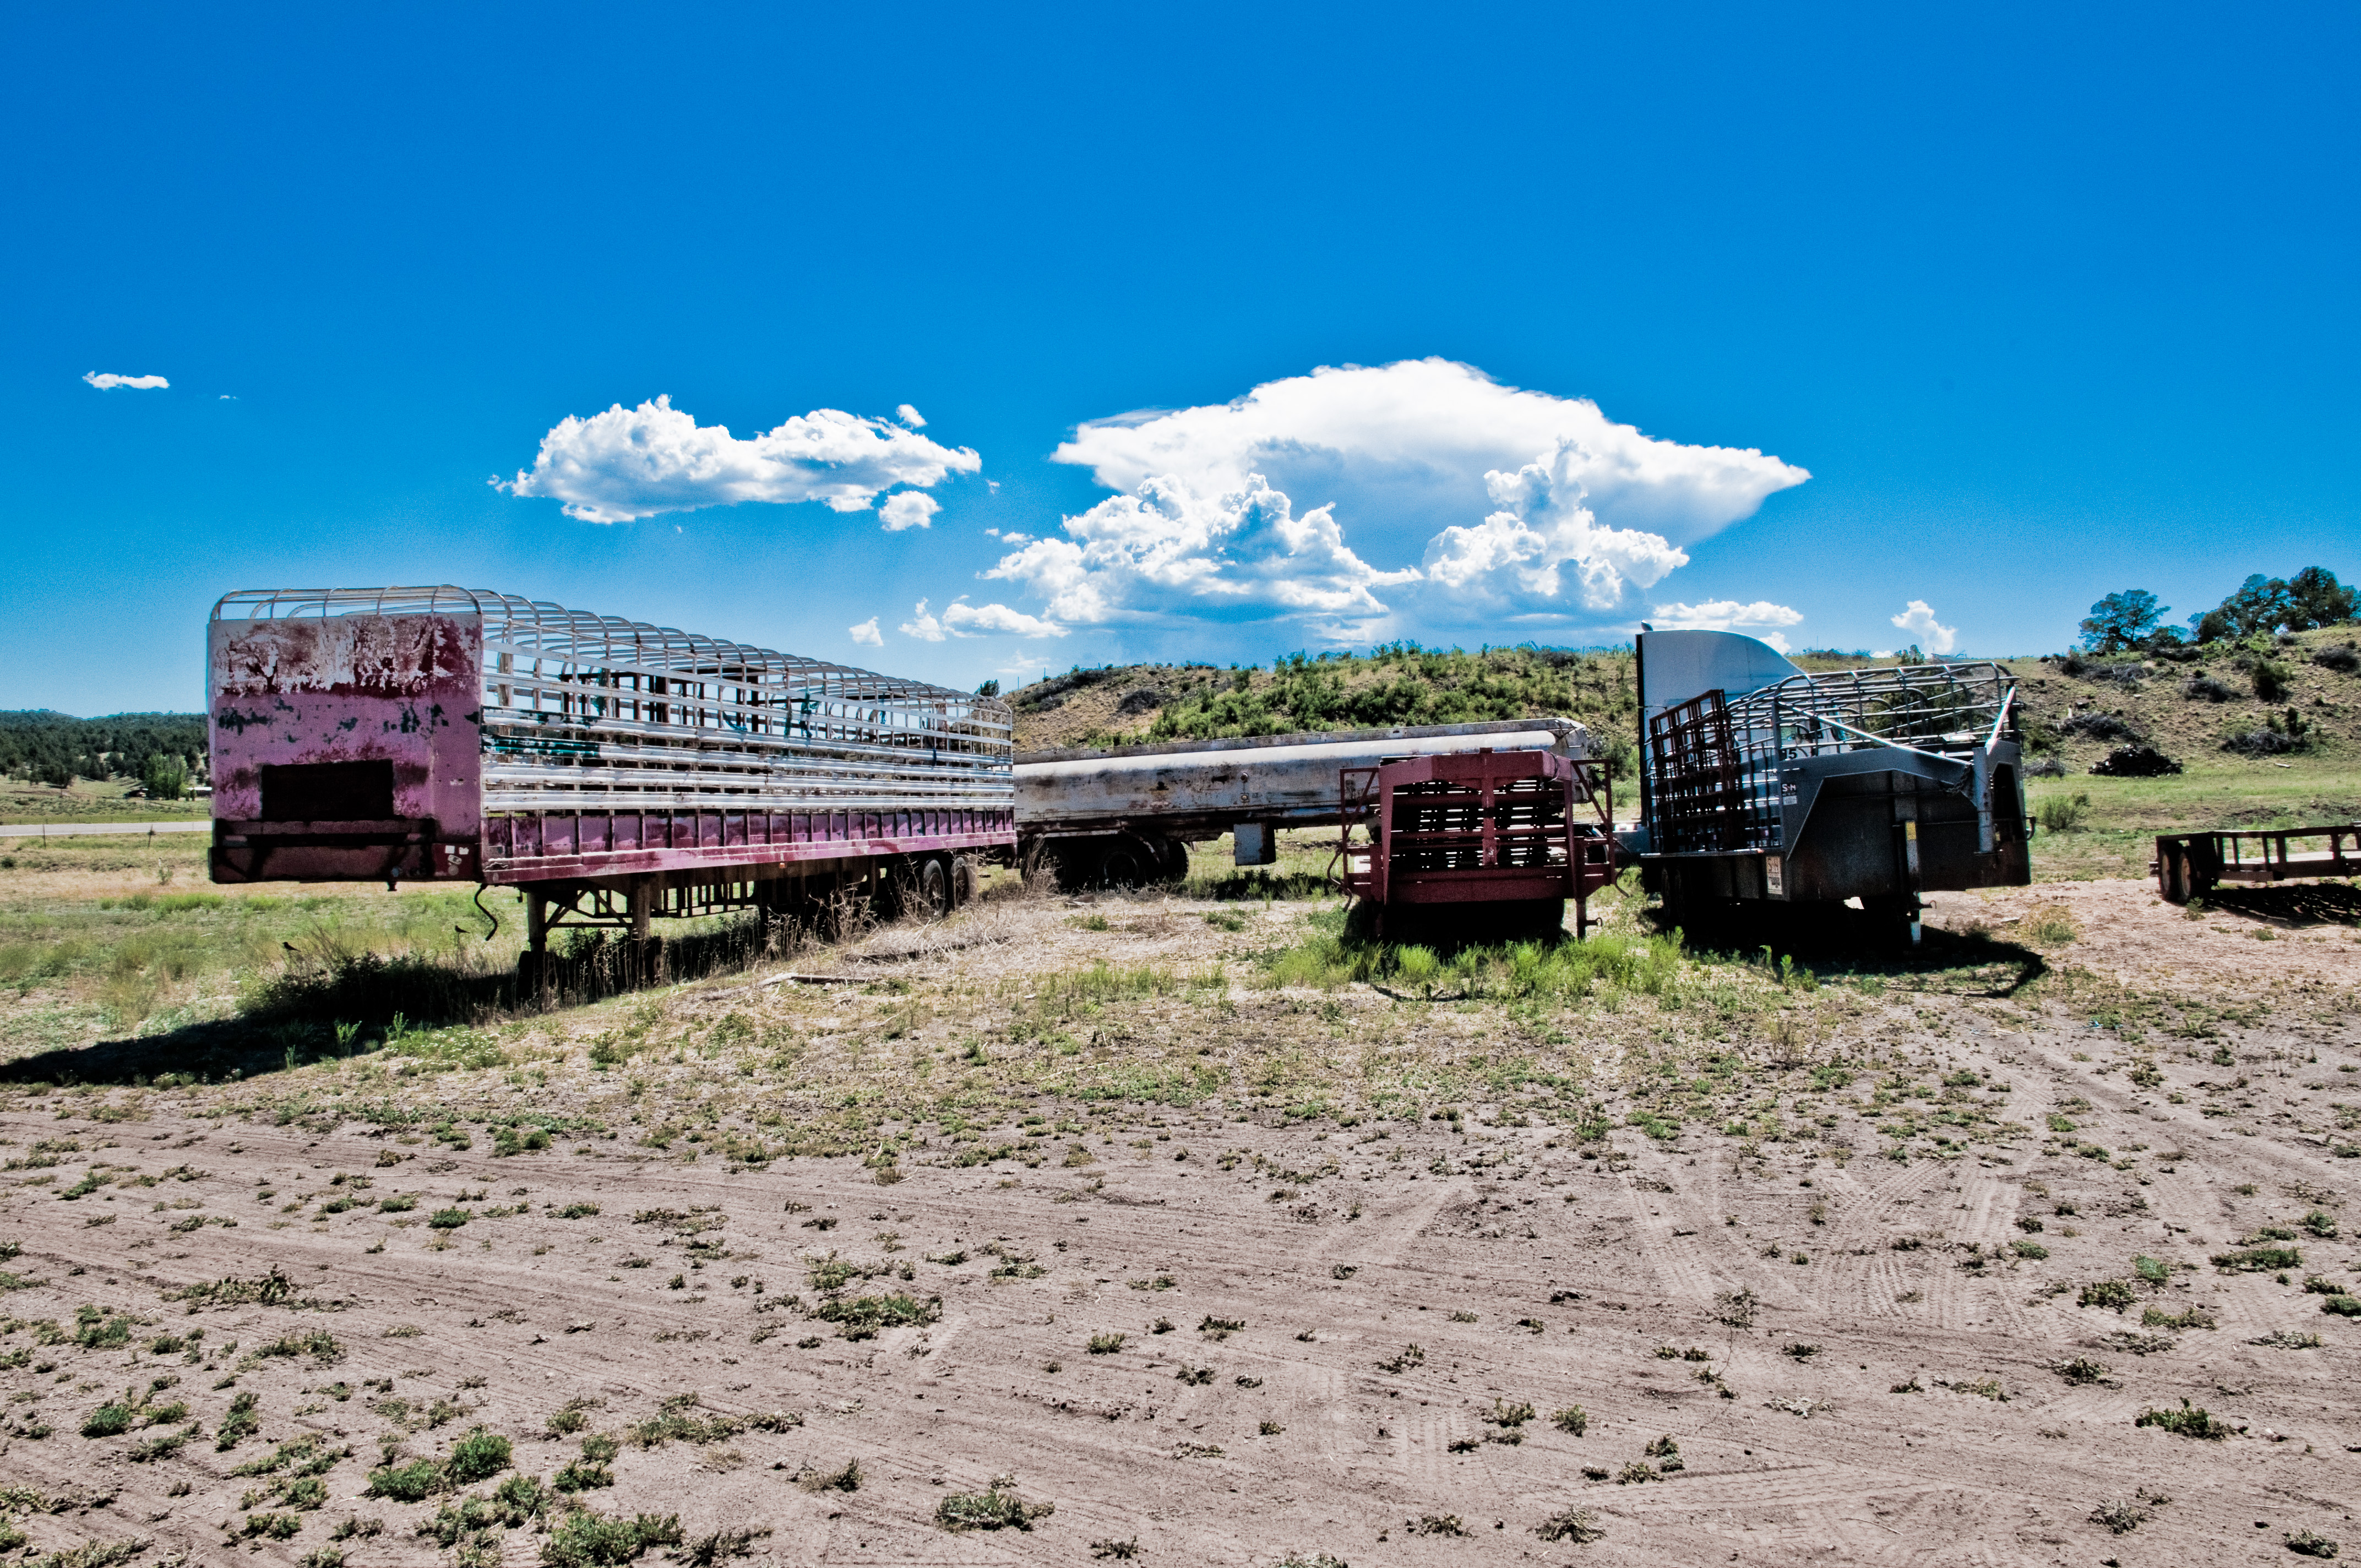
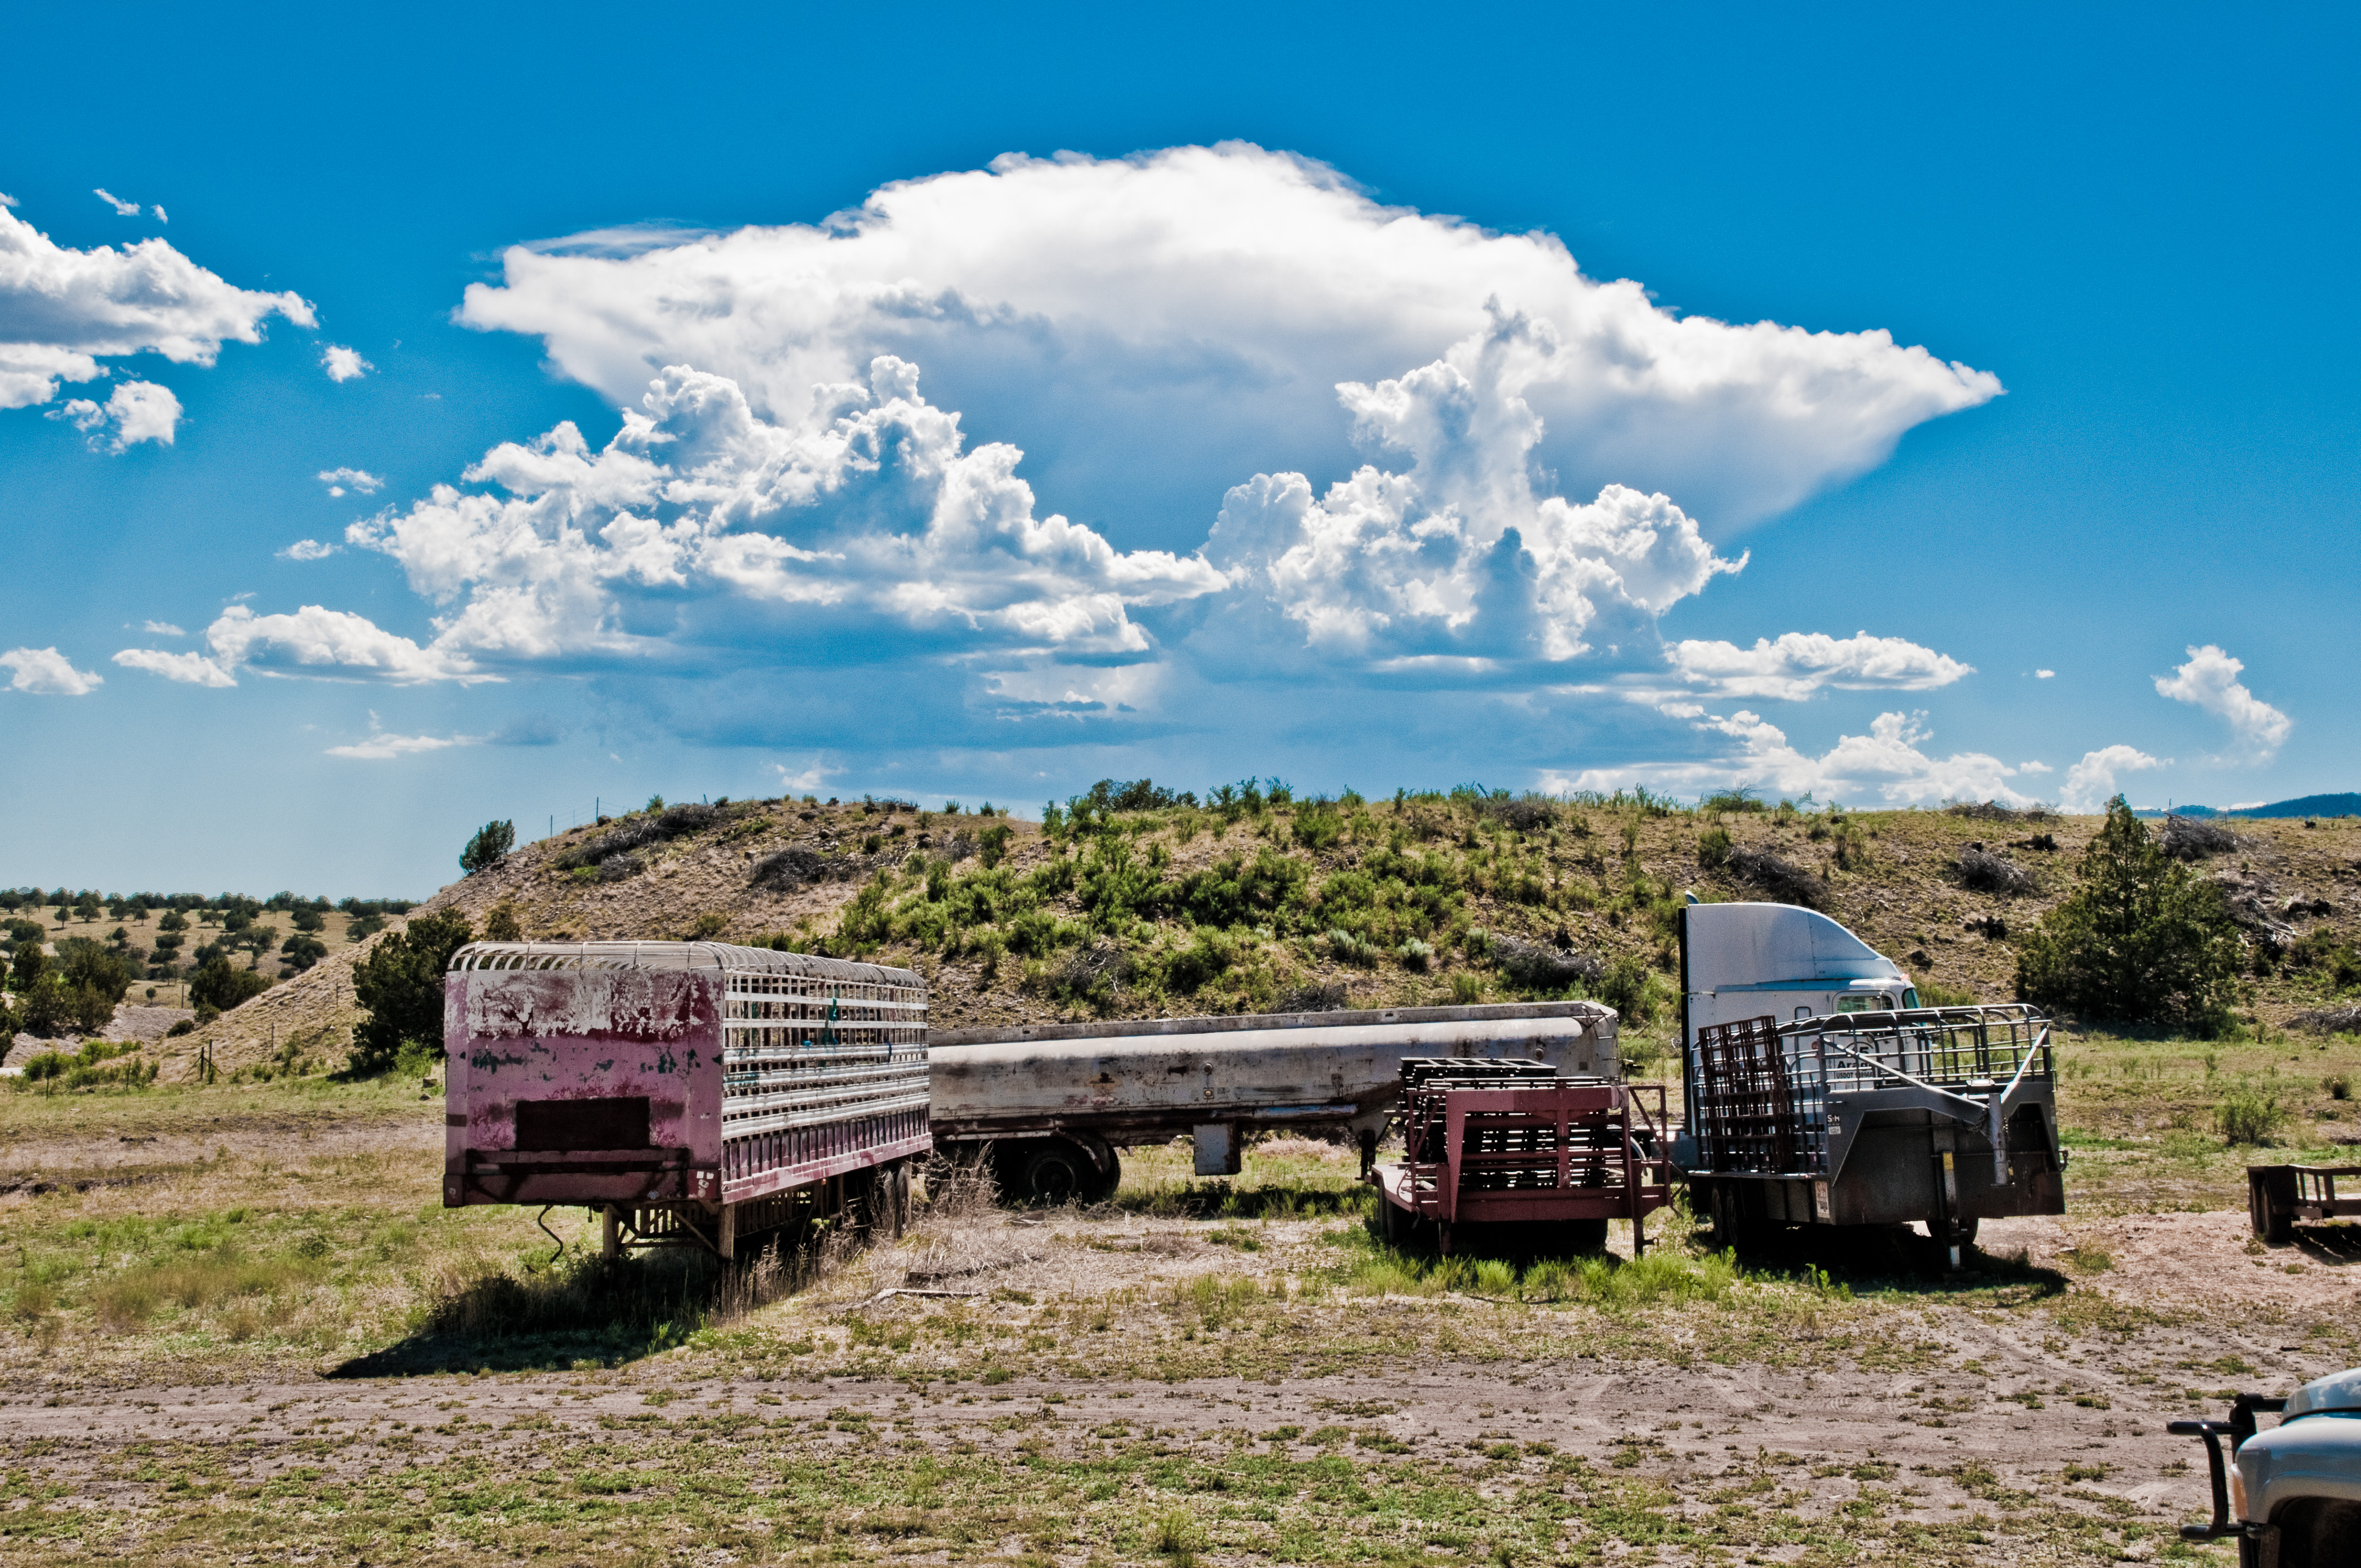
So today’s “aha!” moment relates to how short focal length lenses (ie: wide angle lenses) spread elements apart in the frame, and long focal length (ie: zoom) lenses compress elements. I’ve read about this often and while the examples given in books and on websites were clear enough, when in the field I could not remember which did which and just ended up confused. Then one day I decided to try an experiment and attempt to recreate one shot using both a short and long focal length lenses. This is what I found:
I took the top image with my lens set at 18mm, the widest it will go, and the image below at 135mm, the longest the same lens will go. And wow!! I now know how much zoom will affect the elements. In the second image the background hill and the clouds appear much closer and imposing, and much more important elements in the frame, creating a more dynamic image. And in the interests of transparency, the two images were taken less than a minute apart, so the clouds were in the same location. The second shot was taken from a slightly higher vantage point due to me having to back up a slight hill in order to keep the composition the same in both images.
So my “aha!” moment? Well, I learned that I can radically alter the compositional nature of the elements in the frame by choosing to shoot wide or telephoto. Now telephoto is no longer just used to “get in close” but instead I can use it more mindfully to create the kind of image I want to create. In this case it is a blending of my father-in-law’s ranch equipment against the stunning skies of southern New Mexico.
Thanks for reading. I hope to make this “Aha!” moment a regular feature on this blog. I would welcome any comments and would love to hear about your “Aha!” moments with photography or other creative endeavors.


Thanks, Brian! I think this “Aha moment” feature is going to be great.
Thanks Tom. I hope to write a bunch more “Aha!” posts as I move along in learning photography and creative endeavors. Thanks for stopping by and for commenting!
Oh, it’s definitely true that your throw yourself into everything full force. But that’s a good thing, as long as you try not to stress over how fast you are learning. Reminds me of John Kabat-Zinn and his “wherever you go, there you are” mantra. Whatever your current level of expertise, it is perfect. To me, a good photo is one that captures emotion and/or beauty, and the feeling of being at the scene. Can’t go wrong with those New Mexico skies!
I suppose the key is to photograph what’s in front of you rather than wishing for better/more exotic subject matter. That will come in time.
great examples… interesting post. Thanks for sharing.
Thanks Elaine. Look for more of this type of post coming soon.